How to plan a bulletin board display that lasts the whole school year
Good bulletin board ideas share one quality: they still look right in May. A board works when it reads from across the room, matches the rest of your wall, and changes with the season without you starting over. This guide covers all of it — choosing a layout, picking letters you can read from the carpet, and building a board you can update in an afternoon.
There is a version of this that goes up in a rush the week before the first bell, in a color that matches nothing else on the wall, and then sits untouched until it looks tired by October. Most boards die that way — not from bad taste, but from a plan that never accounted for the second month.
If you would rather start from pieces that already match, every theme in the Matchy Room theme collections uses one locked palette across letters, borders and name tags, so the board belongs to the room the day it goes up.
Key takeaways
- Plan the layout before you print: one header strip, even panels below, and margins so the board can breathe.
- Size letters for the back of the room — a header carries six to eight feet, so it needs to be big.
- Build the board in two parts: a fixed header and background, and swappable accents you change by season.
- Laminate only what you re-use and what children touch, and match the fastener to the wall surface.
What makes a bulletin board display work in a real room?
Three things, and none of them is decoration for its own sake.
It reads from where children stand. A header seen from the carpet, four to eight feet away, has to be large and high-contrast, with letters a beginning reader can decode. If you have to walk up to read the board, it is a poster for adults, not a display for the class.
It matches the room. A board in a different palette than the desks and the door reads as clutter, however neat each piece is. Choose the palette once and everything printed afterwards belongs — the idea behind a Matchy Room theme, and the reason the free pastel name tags are a cheap way to test one before you commit.
It survives the year. A display you have to rebuild from scratch every season quietly stops changing by winter. Build it so the header stays and only the accents move, and the board keeps up with you.
How to choose a bulletin board layout
Before any letters go up, decide the shape of the board. Most classroom bulletin board ideas fail here: the content goes up piece by piece with no plan, and the result reads as busy no matter how nice each element is.
Work from a simple grid. Give the top of the board to a header — the one line read from across the room — and divide the space below into even panels for content. Leave a margin of empty background around the edge and between panels; the empty space is what makes a board look intentional rather than crammed.
Then decide what the board is for before you fill it. A welcome board, a word display, a math focus wall and a student-work board each want a different balance of header to content. Pick one job per board and the layout chooses itself.
Letters you can read from the back of the room
The header is the part everyone sees first, so it is the part worth buying once and re-using. Printable bulletin board letters solve the problem hand-cut or store-bought letters create: uneven sizing, a font that fights your theme, and a palette that never quite matches.
A good set covers both distances. Our Soft Sky bulletin board letters print a full A–Z in upper and lower case, numbers and punctuation, at a main size near 6.4 inches for headers and a mini size near 2.6 inches for captions and labels — plus border strips, clouds, stars and raindrops as accents.
| Piece | Read from | Print size | Laminate? |
|---|---|---|---|
| Header letters | Across the room, 6–8 ft | About 6.4 in tall | Yes — re-used every change |
| Caption / label letters | Up close, at the board | About 2.6 in tall | Only if handled often |
| Border strips & accents | Frames the whole board | Repeating strip | Yes — swapped by season |
Two designs come in the same file, gingham on blue and dots on sage, so you can change the mood without changing the letters. Print at 100%, never "fit to page", or the sizes drift and headers stop lining up.
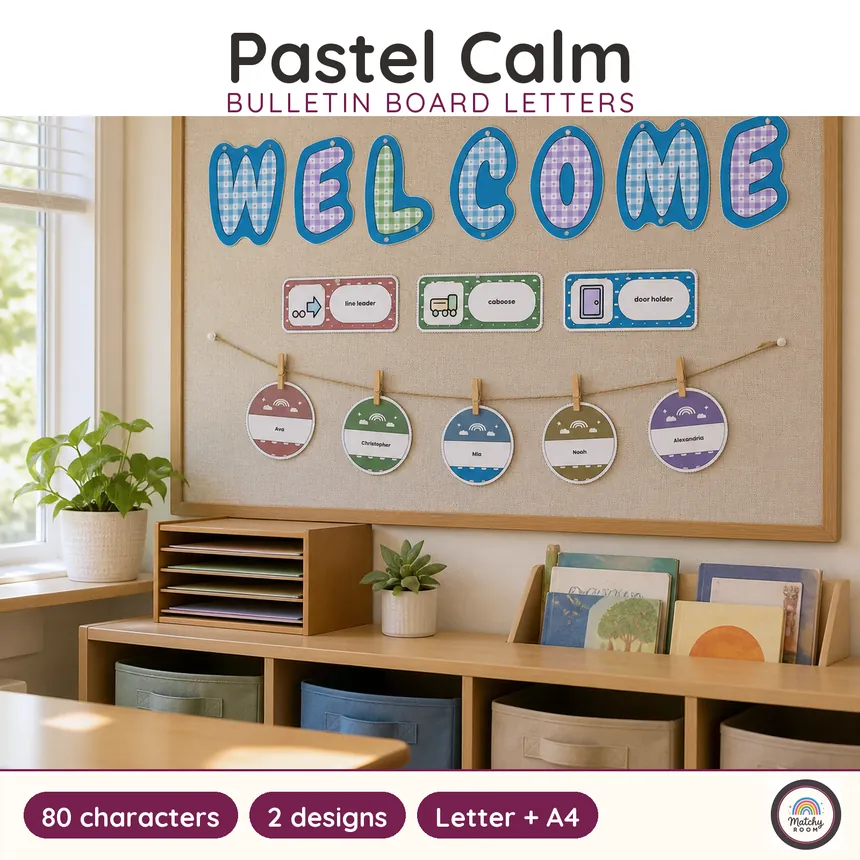
A bulletin board for back to school
The first board of the year is doing enough if it answers two questions: who belongs in this room, and what happens today. Everything else can wait until the routines are running.
A bulletin board back to school display works best kept plain: a warm welcome header, a spot for every student's name or number, and one week-one routine on the board — the daily schedule, a jobs list, or the line-up order. Resist the urge to theme it heavily before the class arrives; you will want that energy for teaching procedures, not for stapling.
Give names their own panel and make them movable. A laminated name card that a child can find and place themselves turns the board into the first small job of the year, and it survives the roster changes that always land in the first fortnight.
Building a seasonal bulletin board you can swap
The trick to a board that keeps up with the year is to split it into a part that stays and a part that changes. A seasonal bulletin board built this way takes an afternoon to update, not a weekend.
Keep fixed: the header letters, the background paper, and the border frame. Change only: the accent shapes, the color of a few pieces, and the content cards. Autumn leaves come in and cool tones go out; the header never moves. Because the letters are laminated, you peel and re-pin the same set through fall, winter and spring instead of cutting new ones.
Store the swap-out pieces in labeled envelopes by season, and the change becomes a ten-minute job you can do after the class leaves rather than a task that eats a Sunday.
Bulletin board ideas for the classroom door
The door is a bulletin board most teachers forget they own, and it is the first surface a family sees. A matched door turns a hallway into part of your room instead of a blank rectangle.
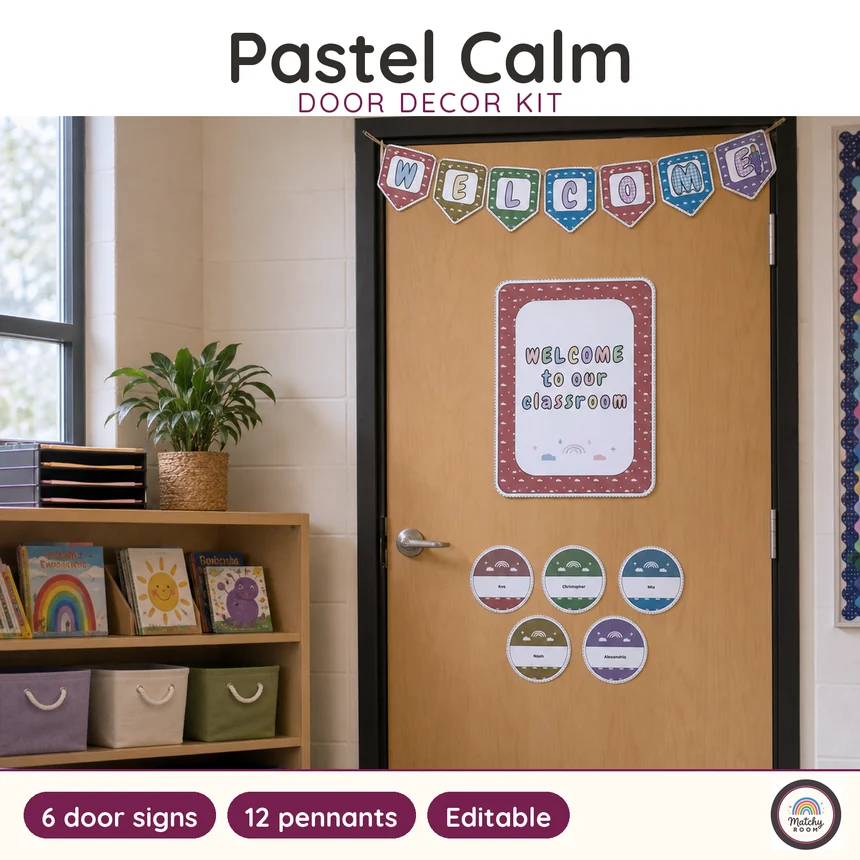
A door decor kit makes this a one-afternoon job: our Soft Sky kit prints 76 cut-out pieces — six door signs, cut-out letters that spell WELCOME, twelve pennants for a banner, forty round name tags, two plates and ten room numbers — all in the same palette as the letters and borders on the wall inside.
Because the name tags and pennants are editable, you type the class list once and print, rather than hand-lettering forty pieces the night before.
Ideas by subject area — math, reading, science corners
Once the welcome board and the door are done, the strongest bulletin board ideas are the ones that teach while they hang. A working display earns its wall space by being used, not just seen.
Reading corner. A small header, a rotating shelf of book recommendations on movable cards, and a spot where children pin a card for a book they finished. The content changes weekly; the header and border stay.
Math focus wall. The current strategy or vocabulary up top in large letters, worked examples below on cards you swap as the unit changes. Keep the layout identical between units so children always know where to look.
Science and seasons. A living board — what is growing, what the weather is doing, what the class is wondering about. This is where a seasonal accent set earns its keep, because the board is supposed to change with the world outside.

Set up your display areas one at a time
You do not have to build every board before the first day, and trying to is how the week before school disappears. Put up the areas in the order children will need them.
Start with the welcome board and the door, because those carry the first day. Add the reading corner in the first week, once you know where the class naturally gathers. Leave the subject-area boards until the units they support actually begin — an empty math focus wall in September teaches nothing, and a board that goes up the week you need it always looks more deliberate than one that has been waiting a month.
Building one area at a time also spreads the laminating and cutting across several afternoons instead of one exhausting weekend.
Print, cut, laminate, hang — the five-step routine
Every printable display comes together the same way, and the order matters more than it looks.
- Choose your layout and palette before you print anything, so every piece belongs to the same board.
- Print at 100% or "actual size", never "fit to page" — fit-to-page shrinks the sheet a few millimeters and the pieces stop matching. Card stock holds up best; paper glued to card also works.
- Cut along the printed trim lines. A paper trimmer beats scissors for anything straight, and the borders especially.
- Laminate the letters, accents and anything children touch. Leave large background paper bare to save film (how our files print and cut).
- Hang the header first, then the border, then the content, working from the frame inward so the board stays square.
Do the header once, well, and you re-use it all year — that is the whole economy of a printed set.
Where the display should live on the wall
A board is read at the moments it is used, so it belongs where those moments happen. A welcome board wants to be by the door; a jobs or schedule board wants to be near the carpet where the day starts; a subject board belongs beside the area it supports.
Height matters as much as place. Put the part children read at their eye level, not yours — a header at adult height is a display for adults. Stand where the class lines up and check the board is still readable from there, because that is the spot where a display is most often ignored.
Leave a little bare wall around each board, too. Boards packed edge to edge blur into one busy surface; a margin of empty wall lets each one read as its own thing.
When the display stops working — common failures
Most boards fail in one of a few predictable ways, and each has a cheap fix that does not involve reprinting everything.
Nobody reads it — it hangs too high or too far from where the content matters. Move it to child height near the place it is used.
It looks tired by October — the whole board was built to be permanent, so nothing ever changes. Rebuild it in two parts next time: a fixed header and swappable accents.
The pieces fall off — the fastener does not match the surface. Use pins through a laminated tab on fabric board, removable strips on a painted wall, and magnetic tape on a whiteboard.
It clashes with the rest of the room — the board went up in its own palette. Choose one palette for the whole room and print everything in it, which is the entire idea behind a matched theme.
Free name tags to start your theme
The cheapest way to test whether a palette works in your room is to print one small piece and live with it for a week. The free pastel name tags are that piece: print-ready in US Letter and A4, in the same palette as the letters and door kit, so if the tags look right on the desks, the board built later will match them.
Laminate the tags once and they survive the mid-year seat change that always comes — peel, move, press back down, no reprinting. It is a small, honest way to see the theme in your own light before you build the whole wall around it.
The short version
Strong bulletin board ideas are less about clever content and more about a plan that survives the year: a header you can read from the carpet, a palette that matches the rest of the room, and a board split into a fixed part and a part you swap by season. Build it once in two layers and you update it in an afternoon instead of rebuilding it four times.
If you want the letters, borders and accents already in one palette, the Soft Sky letter set is the set these bulletin board ideas were written around — and every other piece in the Soft Sky theme prints in the same colors, so the board is the first matched surface in the room, not the last.
Free name tags to start your theme
The pastel name tags are free and print-ready in US Letter and A4 — download them from the freebies page. They use the same palette as the letters and borders, so a board you build later still matches the desks. Laminate them once and the same tags survive a mid-year seat change: peel, move, and press them back down without reprinting.
Frequently asked questions
What makes a good classroom bulletin board display?
One that reads from across the room, matches the rest of your wall, and changes with the season without a full rebuild. Aim for a clear header a child can read from the carpet, a calm border that frames the content instead of competing with it, and accent pieces you can swap out while the header and background stay put.
How big should bulletin board letters be?
Big enough to read from the back of the room. A header that has to carry six to eight feet needs letters around six inches tall; a caption meant to be read up close can be much smaller. Our letter set prints headers at about 6.4 inches and a mini size near 2.6 inches so one file covers both jobs.
How do I make a bulletin board I can reuse each season?
Split the board into a part that stays and a part that changes. Keep the header, background paper and border fixed, and swap only the accent pieces and the content cards. A seasonal bulletin board built this way takes an afternoon to change instead of a weekend, and you are not reprinting the whole thing four times a year.
What should go on a back to school bulletin board?
Keep the first board simple: a warm welcome header, student names or number spots, and one routine children need in week one, such as the daily schedule or a jobs list. A bulletin board back to school display is doing enough if it says who belongs here and what happens today; the themed content can arrive once the routines are running.
Do I need to laminate a bulletin board?
Laminate the pieces you touch — letters you re-use, accent shapes and any cards children move — and leave large background paper unlaminated to save film. Laminated letters survive being peeled off and repositioned when you change the header, which is the whole point of buying a set once instead of cutting new ones every season.
Keep reading

Matchy Room — one theme, a whole room. Coordinated printable classroom decor, created with a teacher.
Reviewed by Lauren, an experienced classroom teacher — 18 years in a public school elementary classroom. Bachelor's degree in Elementary Education. Meet the makers